Cactus and Potted Plant Doodles: Easy Houseplants to Draw
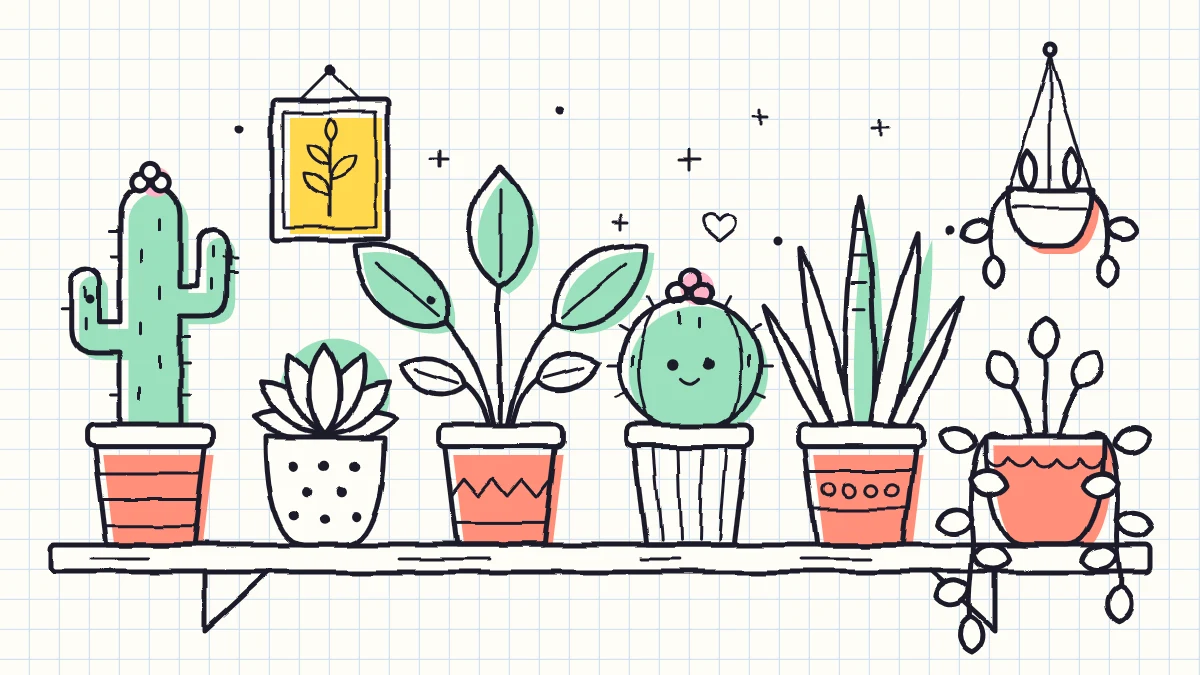
Draw one simple pot, then grow seven easy houseplants out of it: two cactuses, a succulent, blade leaves, a trailing vine, a leafy plant and a sprout in a jar.
Doodle at a glance
What you need
- Black fineliner or gel pen
- Pencil and eraser for guide lines
- Green and orange highlighters for accent color
- Any notebook page
Houseplants are forgiving things to draw. Nobody can tell you a cactus arm is in the wrong place, and a wobbly pot just looks handmade. That makes plant doodles a good pick for a quiet margin, a planner corner or the back of an envelope.
Every doodle here follows the same order: pot first, plant second, small details last. Once you can draw one pot, you can grow seven different plants out of it, each in about a minute or two.
Start With the Pot
The pot is a trapezoid, which is simply a box that is wider at the top than at the bottom. Drawing it first gives the plant something to sit in and sets the size of the whole doodle.
- Draw a short flat line for the top edge, about as wide as your thumbnail.
- From each end, pull a line down and slightly inward, so the two sides lean toward each other.
- Join the two bottom ends with a shorter flat line.
- For the rim, draw a thin, wide rectangle sitting on the top edge, sticking out a little past the pot on both sides.
Round the corners if you like a softer look. A lopsided pot is fine, since real clay pots are rarely perfect either.
Tip
For a plant that spills over the edge, such as a vine, sketch the stems first as light pencil guide lines. Then ink the pot around them, so no pot line cuts through a leaf.
A Potted Cactus in Four Stages
The tall cactus with arms is the one everybody recognizes, so it makes a good first plant.
- Draw the trapezoid pot.
- Add the rim across the top.
- From the rim, draw a tall, narrow arch: up one side, around the top and down the other, like a thumb. Then add two arms. For each arm, draw a short line out sideways from the body, turn the corner upward, round off the tip and come back down beside the first line until you meet the body again. Set one arm higher than the other.
- Scatter short dashes over the body and arms for spines. Finish with a tiny flower on top: a small circle with four or five little bumps around it.
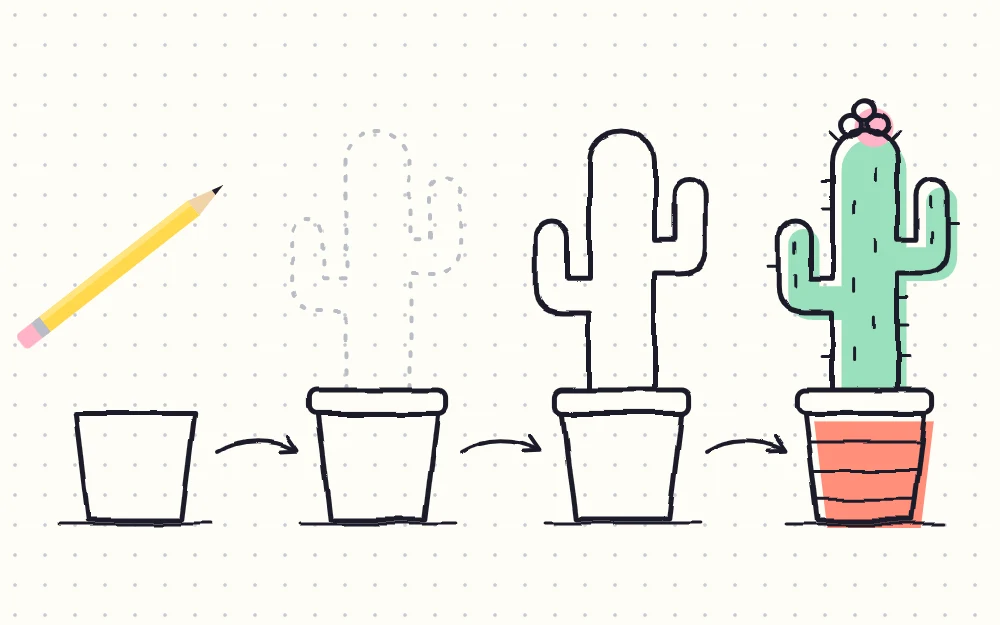
Keep the spines short and tilt them in different directions. Six to ten dashes is plenty. For a change, cross three tiny dashes at one spot to make a star spine, but stick to one spine style per plant.
Six More Plants for the Same Pot
Each of these begins with the same pot and rim. Only the green part changes.
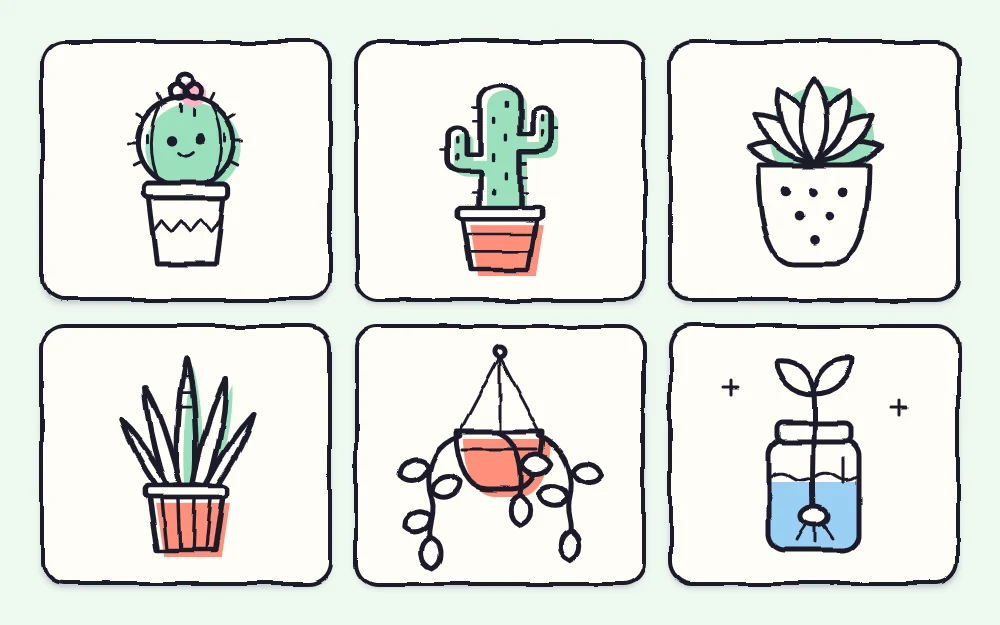
- Round cactus: draw a dome on the rim, like a ball half sunk into the pot. Add three or four curved lines running from the top of the dome down to the rim for ribs, then a few tiny dashes along each rib.
- Rosette succulent: draw one small pointed leaf standing straight up in the middle of the rim. Add a pointed leaf leaning out on each side of it, then two wider ones behind those, leaning so far they are almost flat. You end up with a fan of five to seven plump, pointed leaves.
- Snake-plant blades: draw three to five tall, narrow leaves rising from the rim, each made of two long lines that meet in a point. Vary the heights and let one blade lean. A few wavy stripes across each blade finish it.
- Trailing vine: draw a low mound on the rim, then two or three wavy lines that tumble over the edge and hang past the bottom of the pot. Dot small heart-shaped leaves along each line, alternating left and right.
- Leafy plant: draw three or four curved stems fanning out from the center of the rim. Put one large, simple leaf with a center vein at the end of each stem. The guide to leaf doodles has a dozen leaf shapes you can swap in.
- Sprout in a jar: skip the pot and draw a tall rectangle with rounded bottom corners and a short, narrow lip on top. Add a wavy water line about a third of the way down. Draw a thin stem rising out of the jar with two small teardrop leaves at the tip, and a few squiggly roots hanging below the water line.
Pot Patterns: Stripes, Dots and Zigzag
A plain pot is fine, but a pattern is the easiest way to make a row of plants look different from each other. Keep the pattern on the body of the pot and leave the rim empty.
- Stripes: two or three flat lines across the pot. Curve them very slightly downward in the middle and the pot looks round.
- Dots: a row of evenly spaced dots, then a second row below with each dot sitting under a gap.
- Zigzag: one line of small points running from one side to the other, about halfway down. Add a flat line above and below it for a band.
Hanging Pots
A hanging pot is a bowl instead of a trapezoid. Draw a flat line, then a deep curve under it from one end to the other, like a smile closed off at the top. From the two ends and the middle of the flat line, draw three straight lines up to a single point, and put a small ring or dot there for the hook.
The trailing vine is the natural plant for this pot. Let the wavy stems hang well below the bowl, each a different length.
Line Up a Shelf Row
A row of pots on a shelf turns single doodles into a small scene. Draw one long flat line for the shelf, a second line just below it for thickness, and a small triangle bracket under each end.
- Use an odd number of pots, three or five, and leave a little gap between them.
- Alternate tall and short: a tall cactus, a round one, the blades, a rosette.
- Give every pot a different pattern, but keep the pots roughly the same width.
- Hang one bowl above the shelf to fill the empty space on top.
- Add one accent color for the leaves and a second for the pots, and stop there.
If a gap on the shelf looks bare, tuck in a small mug or a stack of books from the set of household object doodles. And if you would like a pot with a bloom in it instead of a cactus, the steps for a daisy, a tulip and a sunflower fit on top of the same trapezoid.
Frequently asked questions
What is the easiest plant to doodle?
A round cactus is the easiest. It is a dome sitting on a pot, with a few curved rib lines and some short dashes for spines. There are no leaves to arrange and no stems to balance, so it works even at a very small size.
How do you draw cactus spines without making a mess?
Use fewer marks than you think you need. Six to ten short dashes, tilted in different directions and spread evenly, read as spines right away. Keep each dash about the same length and leave clear space between them so the outline of the cactus stays easy to see.
Should the pot or the plant be drawn first?
Draw the pot first for upright plants such as cactuses and blade leaves, because it sets the size and gives the plant a base. For plants that hang over the edge, pencil the stems lightly first, then ink the pot around them so the lines do not cross.