Weather Doodles: Sun, Clouds, Rain and Snow
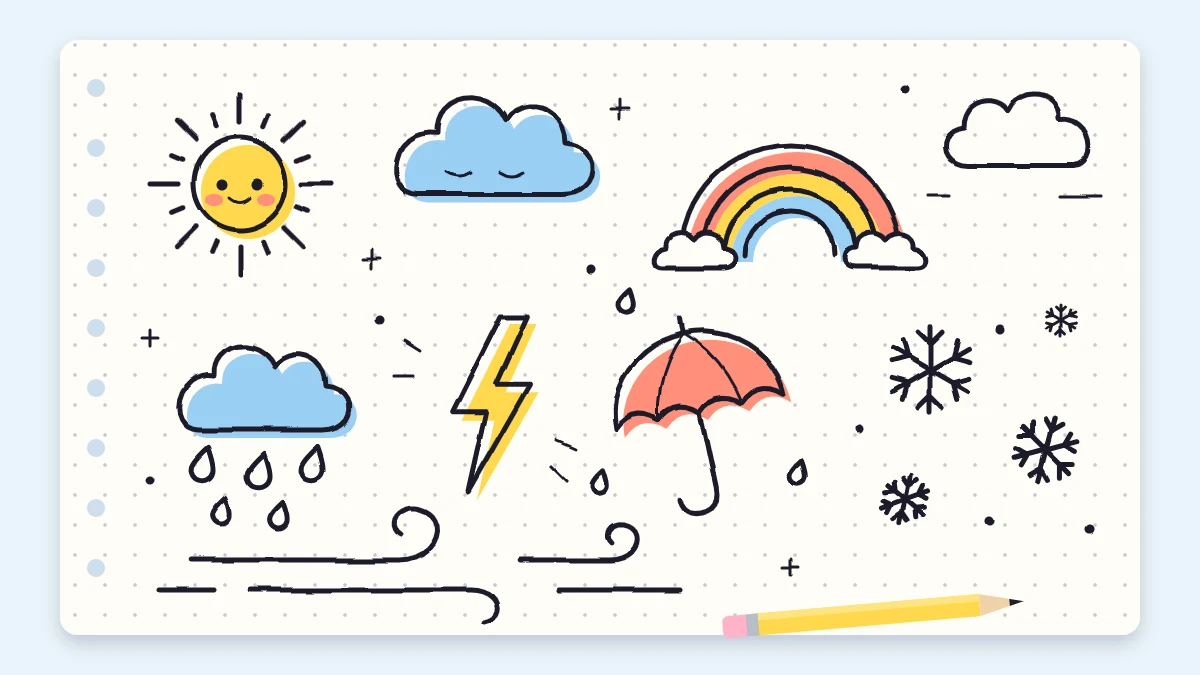
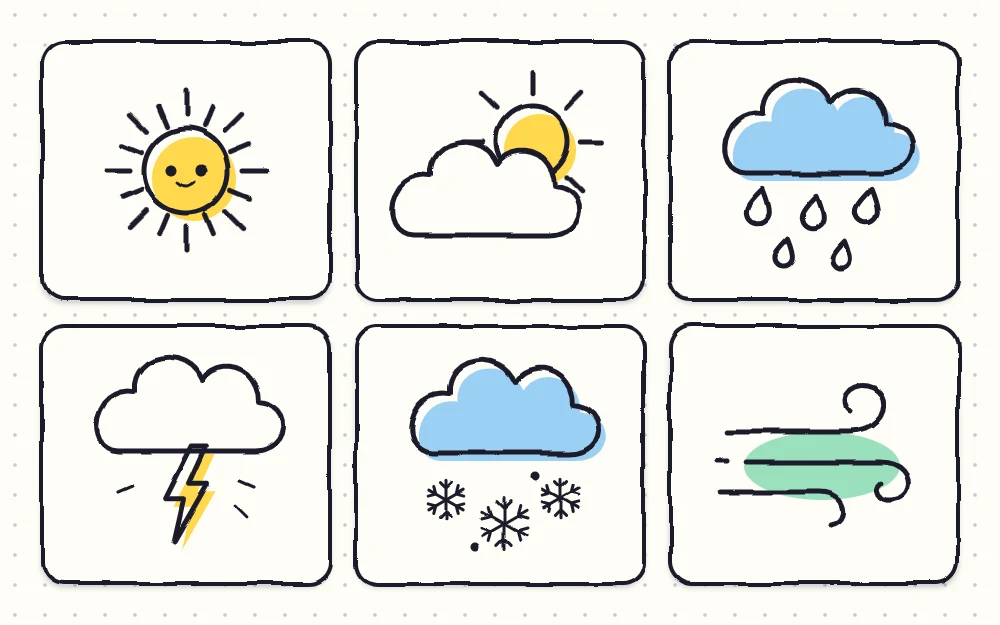
Simple weather symbols for planners and trackers: a sun with three ray styles, a cloud built in four stages, rain, storm and snow clouds, a six-arm snowflake, wind, a rainbow and a matching weekly key.
Doodle at a glance
What you need
- Black fineliner or gel pen, around 0.3 to 0.5 mm
- Pencil and eraser for guide boxes
- Yellow or pale blue highlighter for an accent color
- Planner or notebook page
A small sun in the corner of Monday and a rain cloud over Thursday tell the story of a week faster than any sentence. Weather doodles are some of the most useful little symbols to know, because they slot straight into planners, habit trackers and the tops of diary pages.
They are also built from very little: a circle, a flat line, a few bumps and some dashes. Below are a sun, a cloud drawn stage by stage, and eight more symbols, followed by a way to keep them matching so they work as a weather key.
The sun: one circle, three kinds of rays
Draw a circle about the size of a pea. Leave a small gap around it before the rays start, so the sun does not turn into a spiky ball. Then choose a ray style.
- Dashes. Draw eight short straight lines pointing away from the circle: top, bottom, left and right first, then one in each gap.
- Long and short. Draw the same eight, but make the four diagonal ones half as long.
- Triangles. Draw small pointed triangles all the way around with their bases facing the circle, like a paper crown bent into a ring.
Placing the four main rays first is what keeps the spacing even. More sunny-day ideas, from sunglasses to sailboats, are in the spring and summer doodles.
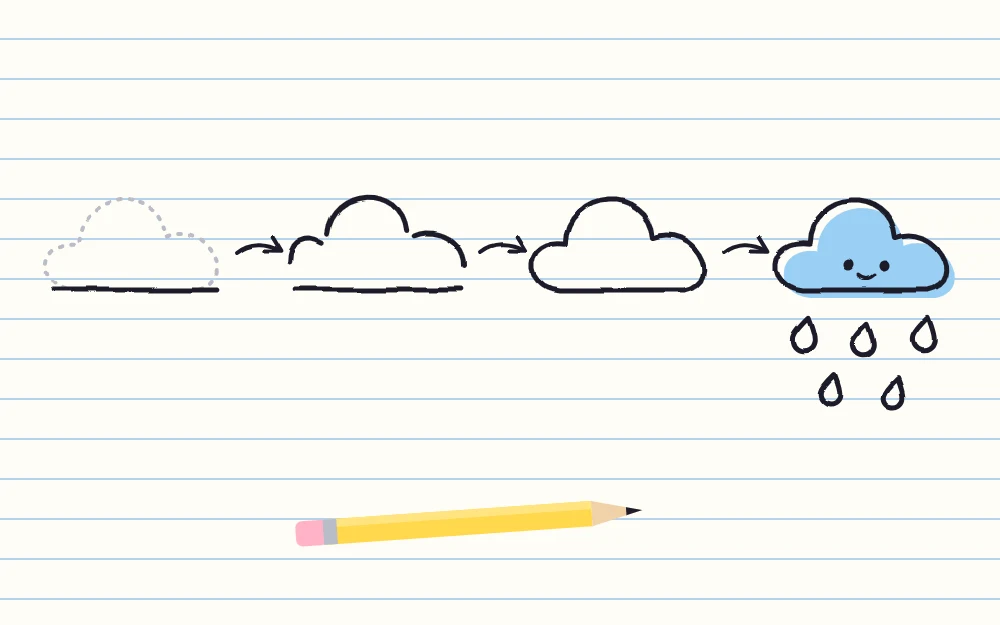
Worked example: a cloud in four stages
The cloud is the base for half the symbols here, so it is worth drawing a few times.
- Baseline. Draw a flat line about as wide as your fingertip.
- Three bumps. Starting at the left end of the line, draw a small bump going up, then a taller, wider bump in the middle, then a medium bump on the right.
- Close it. Bring the last bump down to meet the right end of the baseline, and round off both bottom corners so the cloud sits like a soft bun.
- Add the weather. For rain, draw five short dashes below the base, all slanting the same way.
Tip
Make the three bumps different sizes. Three equal humps look like a row of hills, while small, big, medium reads as a cloud straight away.
Four clouds, four kinds of weather
Keep the cloud outline the same each time and change only what hangs under it.
- Rain cloud. Slanted dashes, as above. For heavy rain, add a second row, placed under the gaps in the first.
- Storm cloud. Draw the bolt from the middle of the base: a slanted line down to the left, a short jog back to the right, then a second slanted line down to a sharp point. Go back up along the same path a little to one side so the bolt has thickness. Fill the cloud with ink or close stripes to make it dark.
- Snow cloud. Draw three or four tiny asterisks under the base at uneven heights, with a dot or two between them.
- Sun behind a cloud. Draw the cloud first. Then add a half circle rising from behind its top left bump, with rays only on the side you can see.
A simple six-arm snowflake
For a snowflake large enough to stand alone, three lines are all it takes.
- Draw a short vertical line.
- Cross it through the center with two slanted lines, like an X, so six arms are spread evenly.
- Near the end of each arm, add a tiny V pointing outward, with its tip sitting on the arm.
- Finish with a dot at the tip of every arm.
Draw two or three at different sizes and scatter dots between them for a snowy corner.
Wind, rainbow, raindrop, umbrella and thermometer
- Wind swirls. Draw a flat line moving right and curl its end up and back into a small loop. Stack two more below, each a different length, with one curling downward.
- Rainbow. Draw one wide arch. Add two or three more arches inside it, each a little smaller and evenly spaced. Rest each end on a tiny cloud, or let the arches stop on a flat line.
- Raindrop. Start with a point at the top. Draw one line curving out and down from it, sweep around a round bottom and come back up to the point. A short curved mark inside one side gives it a shine.
- Umbrella. Draw a wide dome and swap its flat bottom for three scallops. Drop a straight line from the center, past the scallops, and end it in a J-shaped hook.
- Thermometer. Draw a tall, narrow tube with a rounded top, sitting on a circle. Fill the circle and run a thick line partway up the tube. Add four small tick marks down one side and leave out any numbers; a high line means hot and a low one means cold.
Keep the set consistent for a weather key
If you track the weather across a week, the symbols have to be told apart at a glance and still look like a family. A few habits make that easy.
| Weather | Symbol | The detail to keep |
|---|---|---|
| Sunny | Sun | One ray style all week |
| Partly cloudy | Sun behind a cloud | Sun always at the top left |
| Cloudy | Plain cloud | Nothing underneath |
| Rain | Rain cloud | Five dashes, same slant |
| Storm | Dark cloud with a bolt | Cloud filled in |
| Snow | Cloud with asterisks | Asterisks, never dashes |
| Windy | Three swirls | No cloud at all |
- Same size. Pencil a light box in each day’s space and fit the symbol inside it. The guide to drawing simple line icons explains this framing method in full.
- Same pen. A tip around 0.3 to 0.5 mm keeps small dashes and asterisks crisp. Switching pens midweek changes the line weight and breaks the set.
- One accent color. A dab of yellow on every sun or a pale blue behind every cloud is enough.
Draw the key once on the first page of your planner, with each symbol beside its meaning, and copy from it as the week goes on.
Add the night
A weather key covers the day. For clear evenings, swap the sun for a crescent and a few dots, using the shapes in the star and moon doodles. A cloud with a crescent peeking from behind it works just like the daytime version, with no rays to draw.
Frequently asked questions
How do you doodle a simple cloud?
Draw a short flat line for the base. From its left end, draw three bumps across the top, small, then large, then medium, and bring the last one down to the right end of the line. Round the two bottom corners and the cloud is done.
How do I show different kinds of weather with the same cloud?
Keep the outline identical and change what sits under it. Slanted dashes mean rain, tiny asterisks mean snow, and a zigzag bolt under a filled-in cloud means a storm. A half sun peeking from behind the top means partly cloudy.
How small can weather symbols be in a planner?
About the height of two ruled lines is a comfortable size. Smaller than that and the rain dashes and snow asterisks start to merge. A pen tip around 0.3 to 0.5 mm helps keep the small marks separate and readable.