Doodle Dividers: 15 Simple Lines to Separate Notes
Fifteen quick divider lines for notes and planners, each built from one line and one repeated or centered detail, plus advice on matching a divider to the page and knowing when to leave it out.
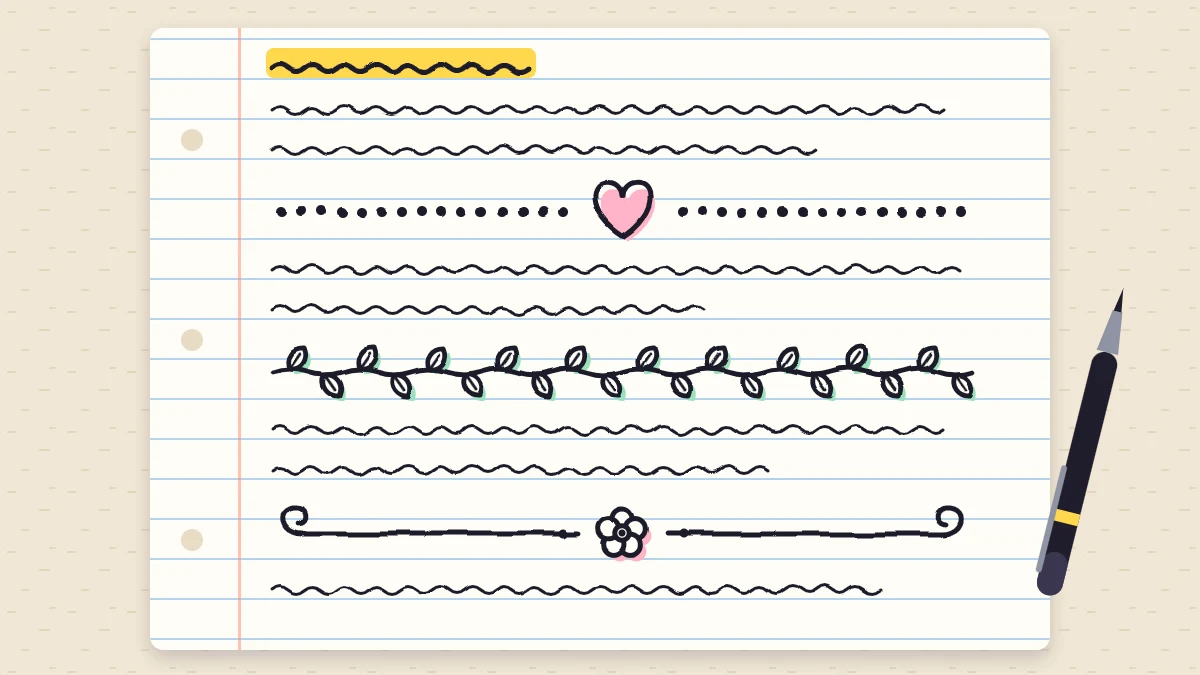
A divider is a decorated line that tells the eye one block of notes has ended and the next one is starting. Doodle dividers do that job in a few seconds, and they make a plain page look planned without stealing space from the writing.
All fifteen below follow the same recipe: one line across the page plus one small detail, either repeated along the line or placed in the middle. Once the recipe feels familiar, you can keep inventing new ones long after this list runs out.
The one-line recipe
Start by deciding where the detail goes: in the center, at both ends, or repeated the whole way across.
On lined paper, let a ruled line carry the divider so it stays level. On blank or dot-grid paper, a light pencil guide line does the same thing and erases once the ink is dry.
Tip
For any divider with a center detail, draw the detail first, then pull the line outward from each side of it. Aiming a long line at an empty middle almost always lands off center.
Five dividers with a detail in the middle or at the ends
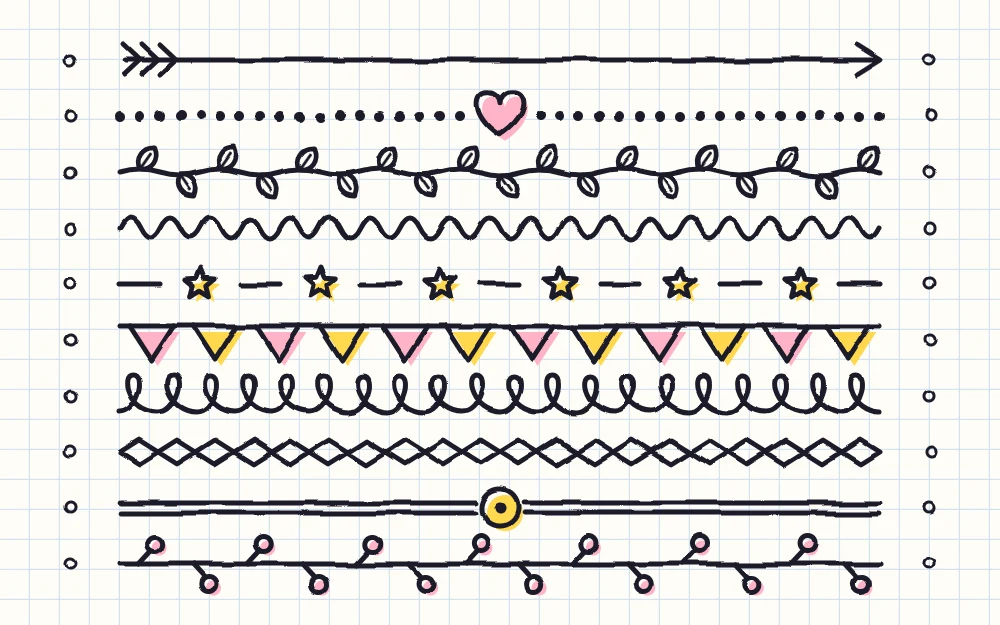
- Arrow line. Draw a straight line. At the right end, add two short strokes that meet the tip in a V shape. At the left end, add three short slanted strokes above the line and three below it for feathers.
- Dotted line with a center heart. Draw a tiny heart in the middle: two round bumps that meet in a point below. Then tap a row of evenly spaced dots out to each side.
- Double line with a center circle. Draw a small circle in the middle. From each side of it, pull two parallel lines that sit close together, and stop both pairs at the same length.
- Line ending in curls. Draw a straight line and roll each end into a small spiral, one curling up and the other curling down.
- Flower in the middle. Draw a small circle, ring it with five round petals, then pull a line out from each side. Add one pointed leaf where each line meets the flower. Any bloom from the set of tiny flower doodles can sit in the same spot.
Five dividers that repeat one shape
- Wave. Draw even humps and dips without lifting the pen. Keeping the wave between two ruled lines holds every hump at the same height.
- Zigzag. Make the same motion as the wave, but with sharp points. Short strokes up and down, all at the same slant, keep the peaks even.
- Loops. Write a row of joined cursive letter e shapes: the line travels right, loops back over itself, and travels on. Keep the loops the same size and the same distance apart.
- Diamond chain. Draw a small zigzag across the page. Go back to the start and draw a mirrored zigzag beneath it so the points meet, which leaves a row of diamonds touching tip to tip. Fill in every other diamond.
- Stitched line. Draw short dashes of equal length with equal gaps between them, like a running stitch in fabric.
Five dividers that hang or grow
- Leafy vine. Draw a gently wavy line. Add small pointed leaves that alternate above and below it, each one attached by its tip and leaning the same way.
- Branch with berries. Draw a nearly straight line with short twigs that alternate from side to side. Put a small circle at the end of each twig and fill in a few of them.
- Bunting. Draw a shallow, sagging curve from edge to edge. Hang small triangles from it with their flat sides on the string, and add stripes or dots to every other flag.
- Dashes and stars. Draw three dashes, then a small star, then three more dashes, and repeat to the end. Three short strokes crossed at their centers make a quick star.
- Dot gradient. Draw one bold dot in the center. Add dots to each side that shrink a little each time until they fade to pinpricks.
Matching the divider to the page
A divider looks most at home when it echoes something already on the page. If the header has a leaf beside it, a leafy vine belongs there. If the page is all boxes and bullet points, a clean double line fits better than bunting.
| Kind of page | Dividers that fit |
|---|---|
| Class or meeting notes | Arrow line, double line with a center circle, stitched line |
| Weekly planner | Dot gradient, dashes and stars, zigzag |
| Recipes and garden notes | Leafy vine, branch with berries, flower in the middle |
| Party plans and lists | Bunting, loops, dotted line with a center heart |
If the page already has a frame, borrow its detail. A divider that repeats the motif from one of your doodle borders ties the whole page together with no extra planning.
Where dividers help and where they clutter
Dividers earn their place between dated entries, between two topics on one page, under a header, and just above a summary or a to-do list. In those spots they replace a blank line and do more work than the gap would.
They start to clutter when one appears after every paragraph, or when a page already carries boxes, highlights and corner drawings. Three different styles on one page also read as noise.
- Stick to one divider style per page, or two across a full spread.
- Try a short divider. One that covers only the middle half of the line often looks lighter than one that runs margin to margin.
Dividers are only one of several simple ways to decorate a notebook page, so on a busy page it can be better to choose a header doodle or a divider, not both.
Keeping the lines clean
A fineliner or gel pen with a tip around 0.3 to 0.5 mm suits these small details. A thicker tip works for the main line if you want it to stand out from the writing.
Watch out
Gel and felt-tip ink can smudge until it dries. Give a fresh divider a few seconds before your hand slides across it to write the next section, and erase pencil guide lines last.
Inventing your own
Pick one item from each of these three choices and you have a new divider:
- Line: straight, wavy, dashed, dotted or double.
- Detail: heart, star, leaf, circle, diamond, triangle or tiny cloud.
- Placement: center, both ends, or repeated along the line.
A wavy line with a star at each end or a dashed line with a leaf in the center takes well under a minute.
Frequently asked questions
How do I keep a doodle divider straight?
Let the paper do the work. On lined paper, draw the divider right along a ruled line. On dot-grid paper, follow one row of dots. On blank paper, pencil a light guide line with the edge of a card or ruler, draw over it in pen, and erase the pencil once the ink is fully dry.
How many dividers should go on one page?
As many as the page has real breaks, which is usually two to four. Use a single style for the whole page so the dividers read as part of the layout. If every paragraph gets its own decorated line, the dividers stop marking anything and the page starts to look crowded.
What is the easiest divider for a beginner?
The dotted line with one small shape in the center is hard to get wrong. Draw the heart, star or circle first, then tap dots out to each side. Uneven spacing barely shows in a row of dots, and the centered shape makes the line look deliberate.