Fruit Doodles: Simple Apples, Lemons, Cherries and More
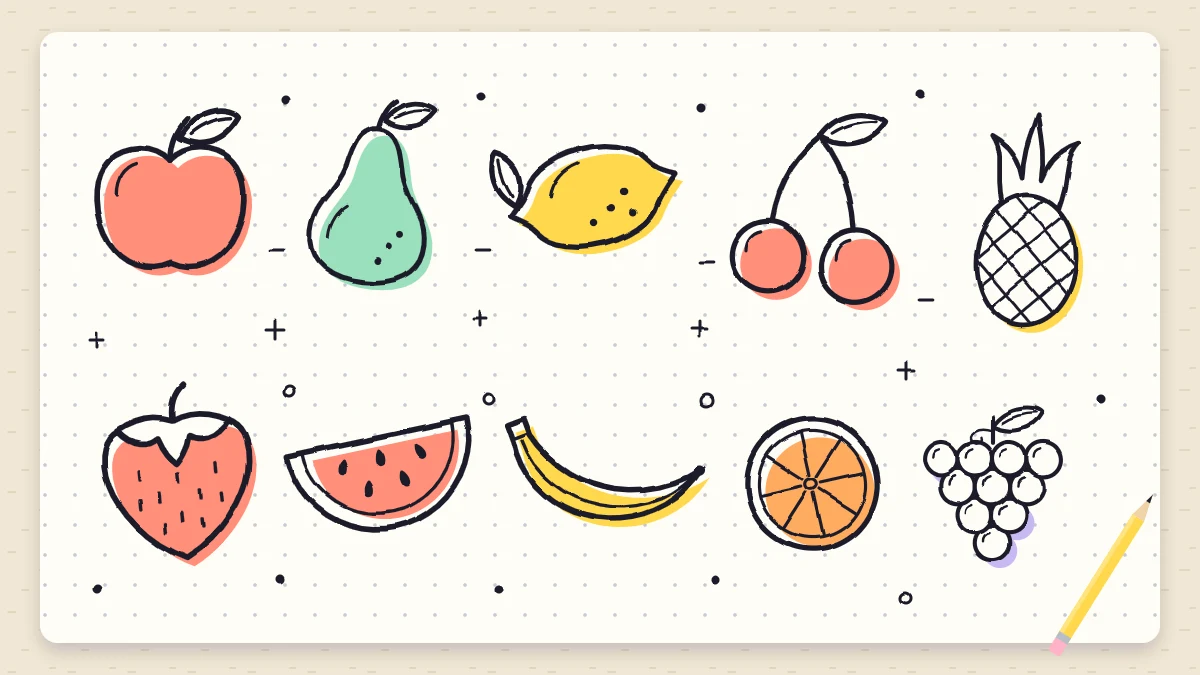
Ten whole fruits from circles and ovals and five cut fruits that show the inside, with a strawberry drawn in four stages and an easy offset color trick to finish them.
Doodle at a glance
What you need
- Black fineliner or gel pen
- Pencil and eraser for guide lines
- Yellow and red highlighters or markers for accents
- Any notebook page
Fruit is a friendly subject for a pen and a spare margin. Nearly every piece is a circle or an oval with a stem stuck on, and real fruit is lumpy enough that a wobbly outline only makes it look more convincing.
This set of fruit doodles covers ten whole fruits and five cut ones, where the inside does the talking. One of them, the strawberry, is broken into four stages so you can see how little it takes.
Start with a strawberry
- Draw the body like a plump heart without the dip: a wide, rounded top that narrows to a soft point at the bottom. Keep the point rounded, not sharp.
- Add the leafy cap. Along the top edge, draw five small pointed leaves fanning outward like a flattened star, with the middle ones overlapping the fruit a little.
- Draw a short, slightly curved stem rising from the center of the cap.
- Dot the body with seeds. Use tiny teardrop marks or short dashes, spaced in loose staggered rows so they do not line up in a grid.
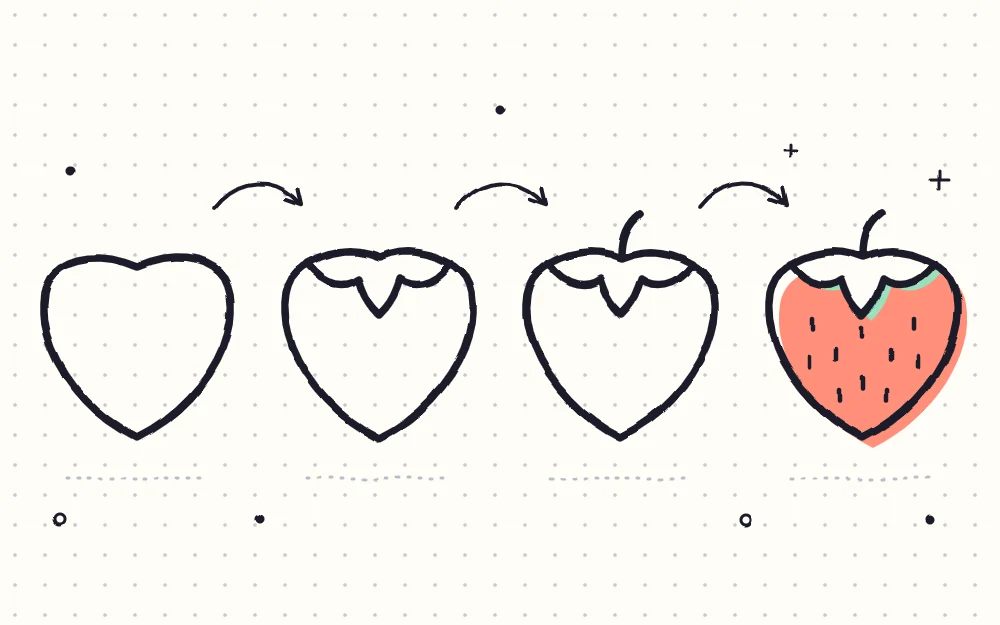
That order works for almost everything below: outline first, then the stem or leaves, then the surface marks.
Whole fruit from circles
- Apple: draw a circle with a small dip at the top and a shallower dip at the bottom, so it looks a bit like a very round heart. Add a short stem from the top dip and one leaf beside it.
- Orange: draw a plain circle. Add a tiny star or dot near the top for the stem end, and a few scattered dots on one side for the peel texture.
- Peach: draw a circle, then one curved line from the top that swings down about halfway, like a seam. Add a single pointed leaf at the top.
- Cherries: draw two small circles a little apart. From the top of each, draw a long curved stem and let the two stems meet at a point above. Add a leaf where they join.
- Grapes: draw a row of three small circles, then a row of two tucked beneath, then one at the bottom, each overlapping its neighbors slightly. Add a short stem with a curly tendril at the top.
If circles feel awkward, the guide to building doodles from basic shapes has a worked apple and a short routine for getting more relaxed with them.
Whole fruit from ovals and curves
- Lemon: draw an oval lying on its side and pull each end into a small rounded nub. A few dots on the skin and a leaf at one end finish it.
- Pear: draw a small circle on top of a larger one, then trace a single smooth outline around both so there is a narrow neck and a wide base. Add a stem and a leaf.
- Banana: draw two curves like a smile, one above the other, close together at both ends and wider apart in the middle. Close one end with a small blunt square for the stem and the other with a tiny dark tip. Add one long line along the middle to show the ridge.
- Pineapple: draw a tall oval and cross it with diagonal lines in both directions for a diamond pattern. On top, draw a tuft of five or six pointed leaves, tallest in the middle, leaning outward at the sides.
Cut fruit: showing the inside
A sliced fruit is often easier to read than a whole one, because the inside pattern is so distinctive.
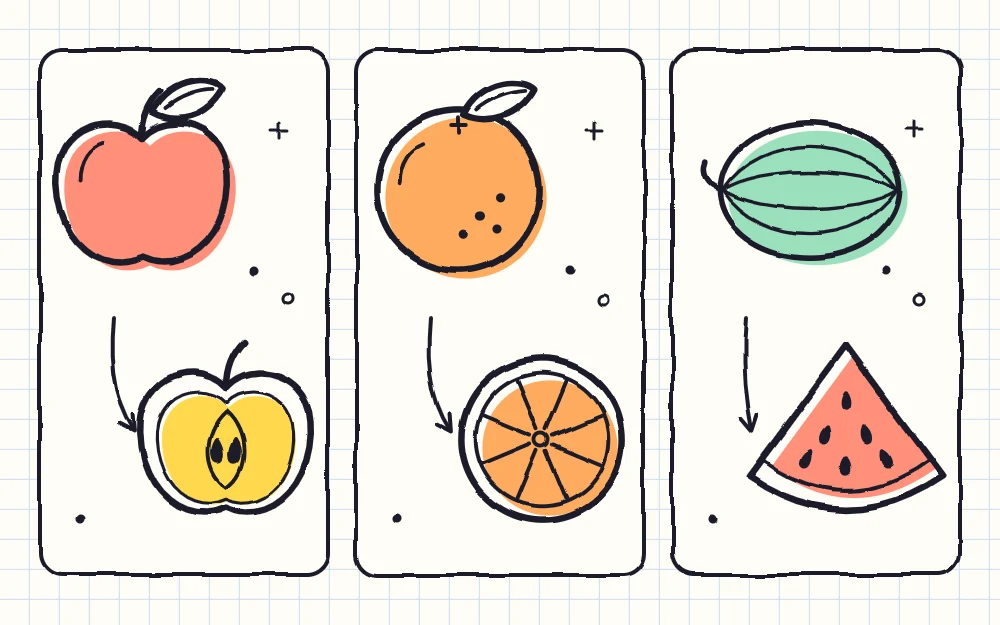
- Apple half: draw the apple outline, then a second line just inside it for the skin. In the center, draw a small pointed oval shape and put two teardrop seeds inside, tips pointing toward each other.
- Orange slice: draw a circle and a second circle just inside for the rind. From a dot in the center, draw six or eight straight lines out to the inner circle, like wheel spokes. Round the corners of each segment if you like.
- Watermelon wedge: draw a triangle with a curved bottom edge, like a slice of pie viewed from the side. Add a second curve just above the bottom for the rind, and scatter a few teardrop seeds in the middle.
- Kiwi half: draw an oval. Put a small pale oval in the center, then a ring of tiny dashes around it, pointing outward like sun rays. Rough up the outer edge with a few short hairs.
- Avocado half: draw a pear shape, then a second outline just inside it. Add a large circle in the wide lower part for the pit.
Tip
Drawing a whole fruit beside its cut version makes a neat pair for a planner corner. Keep both the same size so they clearly belong together.
Leaves, stems and seed marks
Three small parts carry most of the character, so it helps to have one way of drawing each.
- Stem: a short line with a slight curve, a touch thicker at the top. Straight stems look stiff.
- Leaf: a pointed almond shape with one line down the middle, attached where the stem meets the fruit.
- Seeds: small teardrops with the point facing the center of the fruit. Three to five is enough.
- Skin texture: a few dots grouped on one side, never spread evenly over the whole surface.
The offset color trick
Fruit looks great with a flat patch of color that does not quite line up with the outline. Take a highlighter or marker and color a shape roughly the same as the fruit, but shifted a little down and to one side, so a thin strip of white paper shows inside the outline on one edge and the color spills past it on the other.
If the pen line goes down first, give it a minute to dry, because gel and felt-tip ink can smudge. Markers can also bleed through thin paper, so test on a back page.
Two accent colors per page is plenty: yellow and red cover lemons, bananas, apples, cherries and strawberries.
Where fruit doodles fit
A row of five different fruits makes an easy header for a grocery list or meal plan. A single lemon slice in a corner, or cherries beside a date, is enough decoration for a planner page.
Fruit also mixes well with other sets. Put a strawberry on top of a cake slice from the snack and treat doodles, or add a watermelon wedge and a lemon slice to a page of warm-weather doodle ideas.
Frequently asked questions
Which fruit is easiest to doodle?
Cherries and oranges. Cherries are two small circles with long curved stems meeting at the top, and an orange is a plain circle with a dot for the stem end and a few texture dots. Neither needs a neat outline to be recognized.
How do I show that a fruit is cut in half?
Draw the usual outline, then a second line just inside it for the skin or rind. After that, add the inside pattern: seeds in the middle for an apple, spoke lines for an orange, a ring of tiny dashes for a kiwi, or a round pit for an avocado.
What colors work best for fruit doodles?
One or two accent colors are enough. Yellow and red together cover most of the set, and a soft green suits leaves, kiwi and avocado. A flat patch of color shifted slightly away from the outline gives a relaxed, hand-drawn look.